Field Craft
Photographing storm damage to a roof for the insurer
After hail or a hard gale the roof is the part of the house nobody can see properly, and the pictures you take in the next hour will be read by someone who has never stood in your garden. A field photographer's method for a record that holds up.
Published 27 October 2026 From the ground Field entry
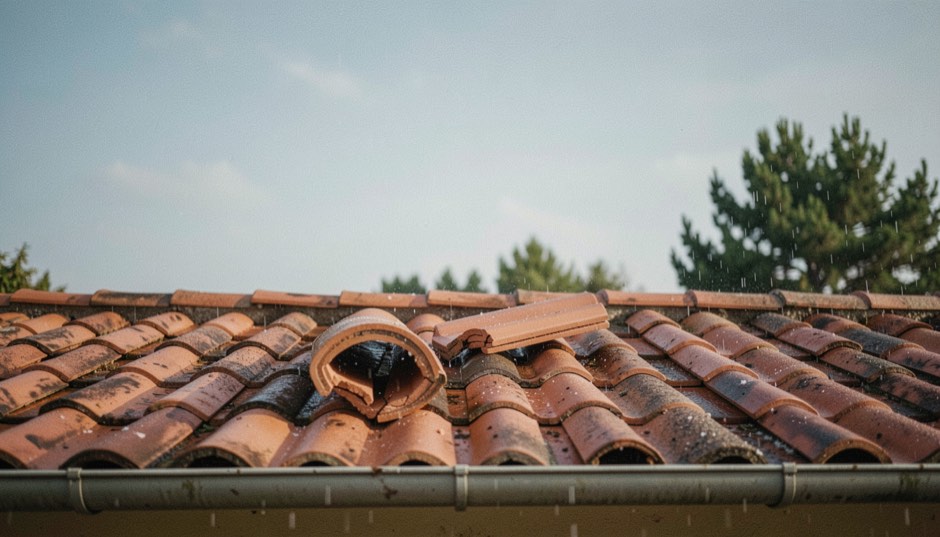
The best record of storm damage to a roof is a short, ordered set of photographs taken from the ground: the whole house with its roof, each damaged area at a long focal length, a close frame with something of known size beside it, and the ceiling inside if water has come through. Date them, keep the originals and do not climb up to improve them.
Why does a roof claim start with photographs?
Because the person assessing it will probably work from your pictures before they ever see the building. A loss adjuster or a roofer can only judge what the frames show, so a roof that looks “a bit rough” in one blurred phone shot and a roof with eleven displaced tiles in a clear sequence lead to very different conversations.
The same logic runs through the trade. The home page of a roofing company in Aubagne, in the Huveaune valley near Marseille, says its quotes start from three to five photographs taken from the ground, one of the house with its roof, one of the damaged part in close-up, and one of the ceiling inside if water has got in. It offers a free quote on photographs and says plainly that nobody should go up on the roof to take them. That is a good minimum for anyone, in Provence or in Pembrokeshire, and it is a shooting brief a photographer can improve on without breaking its spirit.
Which pictures do you actually need?
Think in three distances, the same way you would plan a landscape. First the establishing frame: the whole elevation of the house with the roofline in it, taken from far enough back that the roof reads as a shape. Do this from every side you can reach, because damage is rarely even and an insurer wants to know whether the north slope took the worst of it.
Then the middle distance, which is where a long lens earns its place. Stand where you are safe, on the lawn or across the road, and zoom in on each patch where something has moved: a tile out of its course, a ridge that has opened, a lead flashing lifted at the chimney. The principle is the one set out in height beats focal length, only reversed: you cannot add height, so you take the reach from the lens and keep the camera level with the thing you are measuring.
Last, the close frame. Anything on the ground that has fallen belongs here: a cracked tile, a handful of hailstones in a glove, a dented gutter section. Lay a tape measure or a coin beside it so that size is not a matter of opinion. Every damaged area should end up as a trio, wide, medium and close, each frame clearly the same place as the one before.
On the ground
Shoot more frames than you think you need and in a fixed order, starting at the left of the front elevation and working clockwise. A sequence that follows the house is easy for a stranger to follow; a random scatter of good pictures is not.
Keep the first and last frames of every session as pictures of the street number or the gate. It costs a second and pins the whole batch to the right address.
What light shows the damage best?
Flat, even light is the friend of the record. A grey sky puts the same exposure on every tile, so a tile that has shifted or cracked stands out by its outline and not by a shadow that might be mistaken for something else. This is the same argument made in the entry on why flat grey cloud is not a wasted day, only used for evidence instead of mood.
Low raking sun does the opposite and has its own use. Early or late in the day it throws a shadow off every raised edge, which is exactly how hail dents on metal and the pitting on soft surfaces become visible. If you can, take the same slope twice, once in flat light and once in raking light, and keep both. Our glossary of British light gives the terms for each condition if you need to describe them in a note.
A circular polariser helps with wet clay and slate, which throw back a sheen of sky that hides the surface. Turn it until the glare drops and the tile texture comes back. Do not push the contrast or the colour afterwards: a claim photograph is not a print, and an over-processed frame invites exactly the doubt you are trying to avoid.
How do you record water that has got inside?
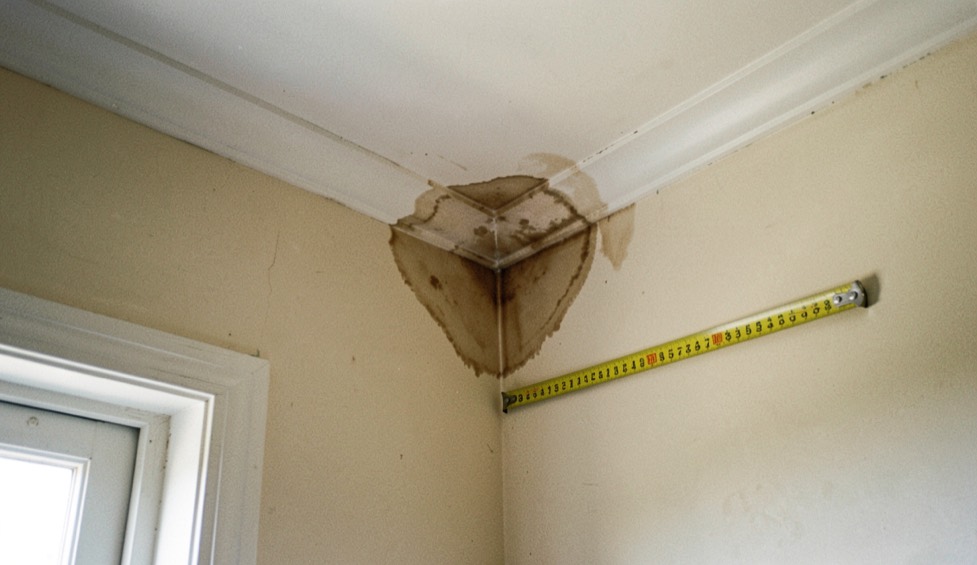
The roof is only half of the evidence. If water has come through, photograph the ceiling and the wall beneath it with the same discipline: one frame of the whole room, one of the stained area with a tape measure beside it, and one close frame of the edge of the stain, where the tide mark shows how far the water has spread.
Use the window light rather than a flash, which flattens the texture of damp plaster and bleaches the colour of the stain. Take the picture again a day later from the same spot. A stain that has grown between two dated frames tells an assessor more about the leak than any description you could write.
If there is a drip, a short video of ten seconds is worth having, with a bucket and its level in the frame. Then protect the room: move furniture, lay out towels, and make the house safe. The pictures are a record, and the first duty is to stop the damage getting worse.
Why do you stay off the roof?
Because no photograph is worth a fall, and a wet, damaged roof is the worst place to stand. Falls from height are one of the leading causes of workplace deaths in Britain, and the national guidance on working at height exists for a reason that applies to a homeowner just as it does to a builder. Tiles that look sound can be loose, and a slope that is dry on top can be slick underneath.
It is the same discipline a photographer applies on a ridge or a shingle bank, and the thinking behind the brief before the edge carries over: decide your limit before you start, not when you are already committed. If a picture can only be taken from the roof, it is a job for a roofer, who will have the harness and the training, and who will photograph it properly as part of the quote.
What do you keep with the files afterwards?
Keep the originals untouched, exactly as they came off the camera or phone, because the date, time and sometimes the location are written into each file. Copy them to a second place the same evening. If you crop or lighten anything for a covering email, save that as a separate copy and name it so.
Add a plain note: the date and time of the storm, what you heard or saw, when you took the pictures, and the order in which you took them. Do not guess at causes or costs in it. Say what the pictures show and leave the interpretation to the people paid to do it. And write down the name of anyone who came to look, so that the sequence of visits is as clear as the sequence of frames.
A short checklist
House and roofline from each side; each damaged area at wide, medium and close distance; fallen pieces with a measure beside them; the ceiling and the edge of any stain; the street number at the start and the end; originals kept, a second copy made the same day.
None of this asks for better equipment than a phone and a steady hand, but it does ask for the habits of a landscape photographer: patience about light, a fixed order, and an honest account of what is in front of the lens. The roof is just another subject that happens to be out of reach.